Shipping Tips
Follow these guidelines to ensure your precious memories arrive safely for digitization
Key Shipping Guidelines:
- Place your film and photos in a secure container
- Use groups of 30 or more for slides, prints, or negatives
- Use a sturdy box that won't crush easily
- Wrap your photos and film in plastic for protection
- Avoid using packing materials that generate dust or debris
- Don't write on the back of photos with marker, ink, or crayon
- Don't package photos to look like packing materials
Detailed Shipping Guidelines
Recommended Practices
1. Place your film and photos in a container
Start by placing your materials in a secure container before putting them in your shipping box.
If you have groups, make sure they're secure and won't shift during transit. You can use archival storage boxes or one of the creative temporary solutions shown in our packaging hints section below.
For long-term storage, we recommend purchasing archival-quality containers so your photos and film return to you protected and ready to store.
2. Use a sturdy box that won't crush easily
Your local post office provides Priority Mail cardboard boxes free of charge, and they work very well for shipping media. FedEx and UPS also provide free shipping boxes at their retail locations.
Make sure the box is appropriately sized for your materials with enough room for protective padding around all sides.
3. Wrap your photos and film in plastic
A Ziploc® bag or a clean plastic bag will help protect your materials against moisture and dust during transit.
For extra protection, consider double-bagging valuable or fragile items, especially if you're shipping during rainy or snowy seasons.
What to Avoid
Dust-Generating Materials
Some padded envelopes use crushed newspaper that can tear and release dust onto your photos and film. Avoid these materials when packaging your memories.
Writing on Photos
Don't write on the back of your photos with magic marker, ink, or crayon. The ink can transfer to the front of adjacent photos when stacked.
Confusing Packaging
Don't package photos to look like packing materials. Make it easy for us to identify what's important when opening your package.
If you need to sandwich a photo between cardboard for protection, clearly mark it so we don't overlook it.
Important Note
Always keep a record of what you've sent, including quantities and descriptions. Take photos of your materials before shipping as a precaution.
Creative Packing Hints by Media Type
Use these practical tips for packaging different types of media
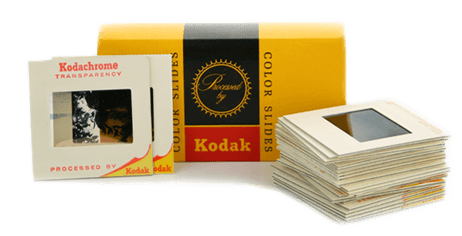
Slides
Send your slides in their original boxes, carousels, or try these creative solutions:
- Aluminum foil type boxes make excellent temporary slide containers
- Use mini post-its to label where slide groupings (50+ slides) start (avoid touching the sticky part to the film)
- If slides don't fill the entire box, cut a piece of cardboard to slide size and place it after the last slide for protection
- Fill empty space with tissue paper or plastic bags
- Secure the box with rubber bands to prevent slides from falling out or getting mixed up during shipping
Pro Tip: Keep slides in their original mounts whenever possible. This helps protect the film and preserves any handwritten notes or dates.
Negatives

Negatives are typically easier to package since they often come in processing sleeves:
- Fold processing sleeves and stack them together
- Place stacked sleeves in a sealable plastic bag, removing all air before sealing
- Label the bag with the group name (50+ negatives or complete roll)
- For loose negatives, follow the same process
- Place bags in a padded envelope before putting them in your shipping box
Important: Handle negatives by the edges only to avoid fingerprints on the image area.
Prints
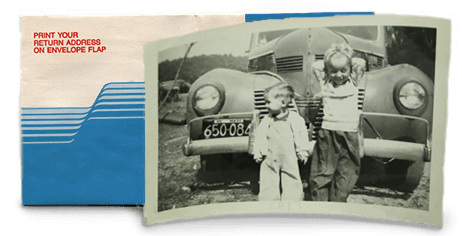
For photo prints, follow these guidelines based on size:
Small Prints (up to 5×7")
- Sealable plastic bags work well
- Group similar sizes together
- Keep prints flat, not folded or bent
Larger Prints
- Cut two pieces of cardboard slightly larger than the prints
- Place prints between the cardboard pieces
- Place inside a large manila envelope
- Ensure at least 2 inches of padding between prints and the exterior of the shipping box
- Bubble wrap works well for this purpose
Movie Reels & Tapes
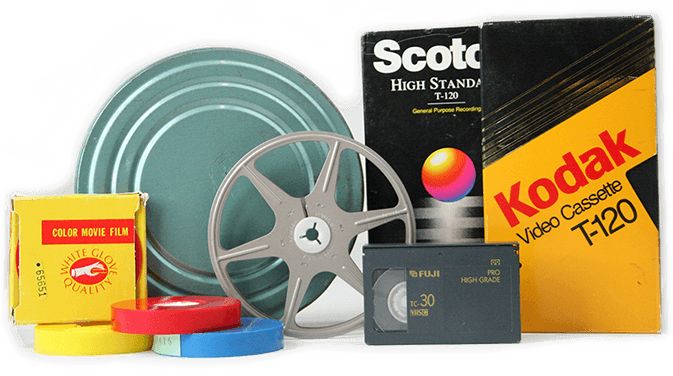
Reels and tapes are sturdier by nature, but still require proper packaging:
- Keep reels and tapes in their original containers when possible
- Secure items in a padded box to minimize shifting during transit
- For movie film reels, tape the end of the film to the reel to prevent unwinding
- For video tapes, ensure the tape is fully rewound and the write-protection tab is intact
- Label each item clearly with masking tape or removable labels
Pro Tip: For film reels, avoid using rubber bands directly on the film as they can cause damage. Instead, secure the film canister or box.
Ready to Preserve Your Memories?
Follow our shipping tips to ensure your precious memories arrive safely for digitization.